If you like what you see here, like me on facebook and follow me on twitter for more tips and to follow what is going on at the Home Front!

Showing posts with label Chickens. Show all posts

Introducing New Chickens to an Established Flock


While there is no magic way to do it "right" (there is always the chance that one or more new chickens will be targeted and killed or pecked to bleeding) I can tell you what I have done for years and years with a good rate of success (never lost a single bird) and little things I have employed to prevent that from happening. Please keep in mind other people have used other techniques that have worked well for them too.

How Old?


These chicks are not old enough.
I start out by waiting till the chicks (I am referring to dual purpose laying hens mostly, meat breed grow faster) are 3 to 4 months old (sometimes older) until they have all grown up feathers and have STOPPED making baby chick noises (this gives them a little more size advantage and for some reason the old hens aren't as aggressive if they aren't making chick noises).

Momma Hen with Chicks

If my momma chicken has hatched out a clutch of chicks, I will leave the chicks in with her (in a separate area from the main flock) then when they are about half the size of her with all grown up feathers, and have basically stopped making baby chicks noises. Then I will introduce them to the main flock all together at once usually after dark. Momma chicken remembers the flock and her place in it so there is usually no problems there PLUS she will protect the chicks fiercely - this has worked EXCEEDINGLY well for me while introducing a hen with chicks back to the flock.

You will notice that as time goes by mamma chicken will spend less and less time with her chicks until she no longer treats them any different from any other member of the flock - no further action on your part is required to "wean" the chicks from the mom. Nature will take care of that for you and before you know it momma chicken will be laying eggs again.


Store Bought Chicks or New Adult Chickens

I don't let them "warm up" to each other by building adjoining pens where they can see each other or anything like that. It just adds alot more work to the introduction and in the end didn't ease the aggression of the established flock. There is nothing wrong with that approach, I just have never noticed that it helped that much. Chickens are birds not people, and therefore will not act like people.

When I introduce chicks to the main flock I do it at night in pitch dark - I don't even use a flash light. Some people say that the chickens wake up in the daylight and realize they have new flock members but the shock of introduction is reduced because the chickens don't recall when exactly the new birds came to be there. By default the new chickens just became part of the flock, they now just have to get their "flock hierarchy" figured out - where as if the new birds were introduced in the daylight the existing flock will more actively try to repel the invaders (and that's how they are usually seen - as a threat).
                           
I don't close them up in the coop together for several months (meaning, I will leave the coop door open to the run day and night) I find when I close them up - the older hens will just use the enclosed space as an excuse to beat the crap out of the new girls. Sometimes the new chicks will choose to perch outside at night for a long time - but eventually they will follow the rest into the coop for the night. Once or twice I have had to catch newbies, and toss their little butts into the coop (but I usually only have to do it once or twice before it dawns on them that it is just easier to go in the coop with the rest of the grown-up chickens than be caught and tossed inside).


CHICKEN TIP: Long handled fishing nets (which are commonly on sale in the spring) are really handy for quickly and safely catching flighty chickens who need to be relocated or examined in person. 


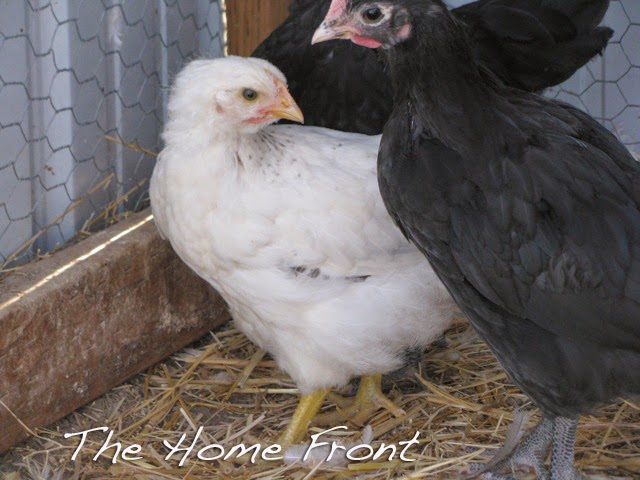
These chicks are getting closer to being old enough to combine, I still would give them more
time if they are still making chick noises.

                               
Our run is quite large and has multiple outdoor perches - so there is PLENTY of room for the new chicks to get away from the older hens, I have found this to be VERY helpful in preventing chick deaths. I also make sure there are 2 or 3 waterers and feeders spaced out around the run - this prevents one hen from guarding the only source of food or water.
                 
I also add them in all at once - they find safety in numbers and it tires out my old hens to chase around 4 or 5 new young hens. Then once introduced, I will check on them frequently and if any chicks are getting pecked to bleeding I will hit them with a little Wonder Dust - this is nice because the Wonder Dust clots the blood, stops the bleeding and makes the blood look like mud. Red blood will invite even more pecking from other flock members who otherwise would not have participated in the pecking.

BUT do know that there will be some butt kicking that goes on as they figure out their place in the flock - as humans we want to intervene and make them all get along, but I have found that they will find peace faster if I let them work things out (separating and then recombining sometimes helps, more often, is doesn't) even if it seems rather unfair and harsh. They will squawk, scream, chase each other, older hens will grab newer ones by the sensitive feathers on the back of the head. Just keep an eye out for blood, and within a couple of weeks they will usually figure things out. For months later there will be the occasional snipe from behind by an older hen - just reminding them that they are on the bottom of the pecking order, but it should grow to be a rare and maybe even humorous occasion.

Other Things You Can Do to Reduce Tension

Other things I will do to help is give them a flock block or two to peck on - maybe a couple of heads of cabbage, some oatmeal, just little things here and there to keep their interest off of the new chicks and on other things. Its been proven that installing nipple waterers also helps to reduce pecking as well.

My group free ranging - yes I left the water going in the stock tank too long and created a pond. Please note the alert Rooster, and how they stay grouped together for safety.


Timing

I actually like doing this in mid summer because my chickens are usually confined to the coop and run during that time since my gardens are in high gear producing. By the end of summer when the chickens get to free-range again, they have figured life out and are all one cohesive flock. I prefer it that way when they are outside of the protection of the run ranging. I don't like having a separate little group of newbies that are hanging out by themselves without the rooster, laying eggs in mysterious spots, trying to roost in trees for the night or that can't figure out how to get back into the coop....

But like I said this works for me and my situation, it may not work for your situation - hopefully there is something in this post that you will find helpful. If not - there are many other articles on internet covering the subject. Just remember that the worst can still happen, you can do everything right and still lose a chick during introductions. Take it as a learning experience and part of owning chickens, all we can do is our best.

Consider raising meat chickens


By Stephanie Dayle via The American Preppers Network  (I wrote this originally for the American Preppers Network - and have since moved it here to my personal site with updated information)

I would like to take a stab at convincing anyone who can, to raise meat chickens. Not so much for the sake of prepping, but for the sake of self-reliance, although, you can never go wrong learning to raise your own food as an emergency preparedness skill. If you are a meat eater, like me, raising meat chickens reconnects you to your food supply and increases your level of self-reliance.

All Photos (c) Stephanie Dayle 2014
It makes you fully realize the work, the love, and the effort that goes into your food. I understand a lot of you live in the city and are only allowed to have a limited number of chickens, if any at all, so I respect your decision to keep only laying hens. But, if you do live where it is allowed and you have the space please consider giving it a try. All things are connected and you can fully appreciate it, when you see it, do it, and smell it first-hand.

Raising one batch of your own meat chickens will make you think twice about reaching for that hormone enriched wrapped chicken meat on the shelf. Not because you feel sorry for it, but because for the first time you truly know that your chicken tastes like real chicken, and you may begin to wonder why that chicken on the shelf does not. You may start to compare the life your chickens lived to those of commercially raised ones.

My meat chickens live a pampered happy life; and are not 'easy' to care for. When asked by my friend, "How can you work so hard for something you are just going to kill in the end?" My answer is, "I live in service to my animals as they will die in service to me."

How to Begin:

Start with a small group of meat chickens - don't worry about ordering anything fancy. When your local feed store gets some Cornish cross chicks in go get a handful of those, if you want five chickens to put in your freezer get six or seven of them because a chick or two may die despite your best efforts that's just the way it goes. If they all live, you can sell extras at market price to your friends or family and recover some of your costs.

               All Photos (c) Stephanie Dayle 2014
Cornish cross chicks are one of the most popular breeds to get for meat chickens, are widely available and usually inexpensive. Try to keep costs under $10 per bird (that includes the chicks, shipping, AND feed). The cost of the chick matters; think of this not as a hobby, but providing for yourself on a very limited budget.

There is so much negative information on the internet on this type of chicken that I often see first time meat chicken buyers skip over them. The truth is, they are probably the easiest and cheapest to raise. Most problems with Cornish Cross Chickens (technically they are a hybrid not a real breed, and therefore cannot reproduce) are caused by people waiting too long to butcher them, and/or over feeding them. An easy way to avoid overfeeding them is after they are several weeks old, to give them food during the day and remove it at night. When to butcher them is purely up to you. So if you can avoid those two pitfalls you should do really well with them.

Cornish cross birds grow fast, so it costs less to feed them - most Cornish cross birds are ready for butchering at around 8-10 weeks. This is usually a good couple weeks before other meat breeds are ready, and several months earlier (if not more) than most "dual purpose" breed birds (click here for a side by side cost comparison of Cornish Cross chicken to Dual Purpose breed chickens). After you've raised a batch and decided that you can handle the process - then explore other meat breeds, cornish cross is just the tip of the iceberg.

Cost: 

There is very little that you will need to purchase for your birds besides plenty of food, a heat light and maybe some bedding. You can make feeders and waterers from repurposed materials - to see an article on that click here. You can keep your chicks in old stock tanks, or kiddie pools, and you can make a makeshift chicken pen or chicken tractor fairly cheaply for them when they are full grown. However, in my honest opinion, free ranging these birds is over rated - these chickens are bred to grow fast off of store-bought food, not grass and bugs.

It seems to me free ranging Cornish X birds make the owners far more happy than the chickens. When I turn mine out they don't seem nearly as interested in scratching or hunting for bugs as my layer hens and they usually follow me around in hopes I will give them food, it's not going to hurt them or make them "less healthy" to keep them in a pen. Just make sure their food is of good quality and that they always have lots of clean fresh water. This breed is designed for that.

All Photos (c) Stephanie Dayle 2014


Many different Uses:

When I butcher the birds I do so quickly to minimize stress. I use a block, or a cone and I don't make the others watch. You can catch the blood in a bucket and add it to your garden. You can save all the random parts, if not for you (I so love chicken hearts, livers, and gizzards - even the feet are eatable) then for your dog or cat's food (click here for a homemade dog food recipe). Their manure is scraped from the pen and composted, then later added back into the garden which will produce some of the garden scraps I will feed to the chickens the following year.

When you cook one of your birds, you turn the carcass into chicken broth that will make lovely homemade soups and stock. The only thing left of them will be a pile of bones which you can dry in your oven or BBQ and turn into bone meal - that can also go back in the garden. Hardly anything is wasted with each part of the process supporting something else.

Long Lasting Value:

Raising your own food teaches children AND adults many lessons, some that would be invaluable during a long-term emergency. It teaches you nothing ever works right the first try and it teaches you humility and how to adapt. It teaches you responsibility and the true value of a meal. It also teaches you compassion and to be thankful for even little things, and it teaches you that even the most trusted dog can benefit from a good fence.

Meat chickens are time-consuming and just like anything else, nothing is free, and good things come with hard work. My Hubby and I both work full-time jobs and we are still able to raise a small batch of 25 and get them butchered, so maybe you can too. Start thinking about what you may need to accommodate a small batch of meat chickens in the spring. Acquire and make things slowly so you get best prices on materials, then, when March comes around and that familiar peeping sound is heard in your local feed and farm supply stores, you'll be ready.


All Photos (c) Stephanie Dayle 2014


Feed Store Chicks: What Parents Need to Know


It’s that time of year again, when local feed stores and farm supply stores have tanks of little baby chicks out on display. I can hear their cute repetitive peeping from here calling me to take them home. While this at first may seem like a free petting zoo opportunity to some parents, the people who end up buying those chicks for food, eggs or to be future pets all while hoping that they will live, may think differently.

Here are some quick and easy guidelines for parents the next time you cruise through the feed store with your kids that will keep the chicks safer and the kids safer. For those who are familiar with chickens and poultry this is old news, but maybe it will help feed store customers that don't have chicken, or someone who is just getting into the 'rural swing' of things. It would be great, for the chicks’ sake if the stores that sell them would post something visible to this effect when the chicks come in but I have never seen it done (at least in my area).

Baby chicks are incapable of maintaining their own body heat.
That is why there is one or two heat lights placed over each container of chicks. These lights will always be hot to the touch, hot enough to burn the skin so mind the location of the lights. If your children must pick up the chicks, they should only hold them for a minute at the longest before gently returning the chick to the container. Not even a child’s body heat is warm enough to keep the chick from getting cold so the sooner they are returned the better.


Encourage the use of both hands for lifting and holding with one hand supporting the feet or bottom. 
Never pick chicks up by the head or neck try scooping them up with two hands.   When returning the chick to the container encourage your kids to gently set them down on the shaving – even letting go of them a few inches above the container can be shock to a baby chick.

Supervise closely and be ready to catch the chick if your child is surprised by movement or by poo and drops the chick. 
It is a fact of life that baby chicks, like baby humans just “go” when ever the need arises and that could be in your child’s hands. Chicks squirm when frightened and being picked up by any human is frightening. Chicks also have no depth perception at this newly hatched age and have no idea how far off the ground they are – a fall from even a child’s height on to a cement floor could kill a newly hatched chick or stress it beyond recovery (meaning even if its still alive when you put it back – it may die later).


Petting is usually preferable to holding, for the chick. 
Try encouraging your child to use one or two fingers to gentle pet baby chicks. Since young children are still developing fine motor skills and dexterity not only is this a good exercise but also it will help keep a wayward hand from inadvertently smashing a chick.

If the chicks are sleeping encourage your children to visit a different container.
Baby chicks, like baby humans, need lots of sleep to grow. Allowing the chicks to sleep reduces stress and will let them grow up into health chickens. If a chick is falling asleep in your child’s hands it’s time to put the chick down, this can be caused from the chick being too tired, cold and/or from stress. Some chicks that are stressed from constant petting and handling do not thrive and will be more susceptible to injury and disease while some others do just fine.

Wash hands after petting and holding chicks.
Salmonella can be found in chicken poo, all baby chicks fall asleep in their poo even if their container is kept super clean. So even if your child didn’t get pooped on they should still wash their hands with warm water and soap after petting baby chicks and make sure hands are kept out of the mouth. A case of salmonella poisoning could be serious or even fatal to a young child. While very rare - it has happened.

Image Credit MNN.com


It is not healthy for chicks to paint them. 
The colored chicks seen on TV and the Internet have actually been colored before they were ever hatched inside the egg with a special dye. Most consumer paints, dyes, and coloring that you have access to at the store are not healthy for baby chicks.

In general I disapprove of commercially dyed chicks as it encourages impulse and gift buys for kids (see below). Although I do see where doing so at a large farm would help identify breeds, types, and batches.

A baby chick makes a bad Easter gift. 
While it may seem like a tempting Easter gift – a baby chick will grow up to be a big chicken. Chickens can live to be 20 years old if conditions are right. They make plenty of noise, especially if they are a rooster, require lots of food, care, do not get along with dogs and will be messy - very messy. Chickens that are bought as Easter presents and then given away, when they grow-up, usually end up in someone’s soup pot despite promises to the opposite. While this is not necessarily a bad thing I am fairly certain it is not what you or your child intended.

Stuffed toy chicks make MUCH better Easter presents than live chicks – that is unless you are embarking on a whole new hobby of chicken keeping, in which case once you have a brooder, feeder and waterer in place - by all means get as many as you would like.


The future owners of these baby chicks thank you for being responsible attentive parents. Happy Easter and Happy Chicken Keeping! 


Click here to follow me on facebook for more more homesteading and preparedness tips!

Wood Pellets for Chicken Bedding


This is one of my most favorite money saving chicken tricks! I use wood pellets for bedding in my chicken coop. 

Wood pellets absorb WAY more most than shavings or straw cutting down on smell and extending the time you can go between coop cleanings. The moisture absorption is handy in the winter because it keeps the humidity level down in your coop thus helping to prevent frostbite. 


Several brands are pure pine (as pictured), which is cheaper for bedding than hardwood pellets. 

Composting Benefit


One of the things that really got me started using wood stove pellets is when absorb moisture they expand to a finer sawdust than shavings. This makes wood pellets MUCH easier to compost than shavings or even straw. Shaving take forever - straw takes a little less time than shaving but sawdust from wood pellets composts real quickly because before the wood is compressed to a pellet it's already been run through a mill and reduced to the size of a grain of rice.


A bag of wood stove pine pellets are about half the cost of the "Pet Bedding" wood pellets and are basically the same thing.

Price


While costs may differ depending on your location, in my area a bale of pine shaving now costs about $8 - where as a bag of pine wood pellets cost me $2.99. I can go through almost a whole winter on 3 bags of wood pellets. You don't need to use a lot of them because they expand so much. A bale of straw now also costs $6-$8. When I used straw only I would go through 2-3 bales a winter, depending on conditions. 

I like using Lignetics - they are fairly inexpensive and widely available in our area. But really I will purchase any pure pine wood pellet that is on sale. Please note: while I have included a link here to Lignetics Pellets - because wood pellets are dense and heavy they are EXCEEDINGLY expensive to buy online. It's much cheaper to run down to Costco, Lowes, the local Feed store, or the local farm supply store and pick some up. 

I have nothing against straw, I just stopped using it because I came across a batch that was full of mites. There are no bugs or critters in wood stove pellets. The challenge is of course finding somewhere dry to store the pellets if you buy them in bulk for another discount.

Chicks

When I have chicks in our brooder I will use pellets but then cover the pellets with a thick lay of actual pine shaving or straw. I just don't trust the little guys to 'not eat' the pellets. This way I still get the moisture absorption, and fume control benefits. Very handy trick for a brooder full of meat chickens. 


Wood Pellet Questions:


Won't my chickens eat the pellets?


I have been using wood stove pellets for going on 5 years now with a flock that ranges from 50-25 yearly, and have not had A SINGLE problem with my hens eating the pellets. How do I know this? Every year I butcher a few of my oldest hens that aren't laying much anymore, the meat birds and any roosters that we are not keeping and while I am processing them I look for evidence. I have never found that they have consumed the wood pellets. Since I feed 'layer pellets' I make it a point to look and pay attention to what they are eating. 

However chickens have killed themselves before by eating grass, pine shaving and rocks. So I am sure somewhere some poor little hen has killed herself eating wood pellets too. If this concerns you, opt for a different kind of bedding - I am merely offering an idea.

Are Hardwood Pellets Bad? What about Oak? 

I have read up on oak and found it to be just fine - oak chips from furniture shops are generally bad for chickens because it has been treated with ammonia, which is bad for their lungs. These 'treated' oak chips are not allowed in the manufacturing of wood stove pellets. Other than that hardwood is fine - beechwood is kinda bad for chickens though, if in doubt stick to pine pellets.

Aren't there chemicals and glues in wood stove pellets?

Chemicals and glues aren't allowed in the production of wood pellet manufacturing because the end product has to be safe to burn. The pellets are held to together with their own moisture and sap. No additional chemicals are added.


Click Here to See a Video on How Wood Stove Pellets are Made!


If you like what you see here click here to follow me on facebook for more homesteading and preparedness tips. 

What Can I Feed My Chickens?


Here is the short answer, in addition to chicken food, and scratch: Almost anything.


Here is the long answer for inquiring minds: Chickens love table scraps and can eat almost anything you eat and are a wonderful addition to a self-reliant, self sufficient lifestyle taking care of table and garden scraps throughout the year. I have seen literally hundreds of blog posts from people listing all kinds of off the wall things chickens supposedly can't eat. However, unless they are backed up (aka: linked to a creditable source within the article) I pay little attention. Here is a list of foods that chickens can eat that people have common questions about from the good people at the the Back Yard Chicken Forum.


Chickens CAN EAT THESE FOODS.

  • Apples  Raw and Applesauce:  (Apple seeds contain cyanide, but not in sufficient quantities to kill)
  • Asparagus  Raw or cooked:  Okay to feed, but not a favorite.

  • Bananas: High in potassium, a good treat (they usually will not eat the peel).
  • Beans:  Well-cooked only, never dry also, green beans are good.
  • 
Beets and beet greens: Go for it. 
  • Berries of all kinds:  A treat, especially strawberries.

  • Breads of all kinds: Good use for stale bread or rolls - feed starches in moderation.

  • Broccoli & Cauliflower: Good for chickens. 
  • 
Cabbage & Brussels Sprouts:  Whole head or scraps.
  • Carrots  Raw and Cooked:  They like carrot greens too.

  • Catfood: Wet and dry - in moderation.  
  • 
Cereal: Avoid highly sugared cereal such as Cocopuffs, etc.

  • Cheese:  Including cottage cheese, feed in moderation, fatty but a good source of protein and calcium

  • Cooked Chicken:  They may like it and it won't kill them, but... ummm SO wrong.

  • Corn on Cob and Canned: Raw and cooked. 
  • 
Crickets, meal worms, maggots, earth worms, etc: Can be bought as fishing bait, at pet-supply stores or you can raise them yourself. Great treats, provides protein and its fun to watch the chickens catch them.

  • Cucumbers: Let mature for yummy seeds and flesh, peels are good too.
  • Eggs:  Hard cooked and scrambled are a good source of protein, and a favorite treat.  Feed cooked eggs only because you don't want your chickens to start eating their own raw eggs.

  • Eggplant: Fruit ok in moderation, avoid peels. Eggplants are in the nightshade family and contain Solanine. 
  • 
Fish / Seafood: Cooked flesh only. Shells and peelings are high in calcium and beneficial. 
  • Flowers:  Make sure they haven't been treated with pesticides, such as florist flowers might be. Marigolds, nasturtiums, pansies, etc... are all beneficial.

  • Fruit:  Pears, peaches, cherries, apples  

  • Grains:  Bulgar, flax, niger, wheat-berries, etc.  
  • 
Grapes: Seedless. Great fun - the cause of many entertaining "chicken keep away"games.

  • Grits:  Cooked "leftovers" only.  

  • Lawn Clippings: Only if it's not fertilized and not treated with chemicals or pesticides. 
  • Lettuce / Kale: Any leafy greens, spinach collards, chickweed included.  A big treat, depending on how much other greenery they have access to.
  • Meat scraps of any kind:  Not too fatty.  In moderation, a good source of protein

  • Melon:  Cantaloupe, etc...both seeds and flesh are good chicken treats.

  • Milk: Plain, raw or slightly sour - good for chickens and they love it.
  • Oatmeal  Raw or cooked:  Cooked makes a nice warm treat on a cold winter day - high in protein.
  • Pasta / Macaroni:  Cooked spaghetti, etc, a favorite next to live bugs, but does not contain much nutrition.
 
  • Peas:  Peas and pea tendrils and flowers.
  • 
Peppers: Don't really like them but won't hurt them. 
  • 
Pomegranates:  Raw, seeds are a big treat. 
  • 
Popcorn: Popped, no butter, no salt. Seeds, just like any other dried corn, will be fairly indigestible unless you grind it a bit. 
  • Potatoes / Sweet Potatoes / Yams: Cooked - avoid green parts of peels!  Starchy, not much nutrition.
  • Pumpkins / Winter Squash:  Raw or cooked. Both seeds and flesh are a nutritious treat.

  • Raisins: Go for it.  

  • Rice: Cooked only, pilaf mixes are okay too, plain white rice has very little nutrition.

  • Sprouts: Wheat and oat sprouts are great! Good for greens in mid-winter.

  • Summer Squash:  Yellow squash and zucchini, yellow squash not a huge favorite, but okay to feed.
  • Sunflower Seeds:  Sunflower seeds with the shell still on is fine to feed, as well as with the shell off. A good treat, helps hens lay eggs and grow healthy feathers.

  • Tomatos:  Raw and or cooked.  
Avoid feeding the plants (again nightshade family - Solanine).
  • Turnips: Cooked. Not a huge favorite but not harmful.

  • Watermelon:  Served cold, it can keep chickens cool and hydrated during hot summers.  Seeds and flesh are both okay to feed. They will peck a rind clean then add rind to compost pile.
  • Yogurt  Plain or Flavored: A big favorite and good for their digestive systems. Plain is better and has less sugar than flavored yogurt.
My Barred Rock hen eating a mouse

Again, meat is OK. Chickens are omnivores and in the wild they will eat mice, snakes, frogs, lizards and dead carcasses (like eagles, vultures, hawks and ravens do).  Much to my amazement I have seen feral chickens in Hawaii (visited with my folk once when I was young) stand around and eat road kill. Nasty huh?  It does not make them peck at each other, they will not pick up disease in that manner. Too many chickens in a small area makes them peck at each other.

Some people say "No Onions": Really? They point to this article (http://www.vet.k-state.edu/features/VetQuarterly/KVQspr05.pdf) and claim they cause heinz anemia. NO where in that article does it say onions are bad for poultry, chickens or birds. Onions are only a danger to livestock and dogs if they are eaten in very large amounts - if you were to apply this to chickens, onions would also be fine in small amounts. My chickens eat small amounts of onions and onion peel frequently  - they don't taint the flavor of the eggs, my flock is super healthy, and I have only had one hen die on me since I have been keeping chickens as an adult. You decide.

Some people say no Ham - because of the salt. I say ham is ok in very small amounts.

Some people say asparagus will taint the flavor of the eggs. I have fed literally pounds and pounds of asparagus to them each spring and have NEVER noticed even a slight difference.

Foods to AVOID FEEDING Chickens:
also from BYC Forum (see link above), additional linked information provided by me - click on the "blue links" to see the source of the information and learn for yourself.

  • Raw green potatoes and green potato peels: Toxic substance called Solanine.
 While not fatal they aren't "good" for chickens. Many people feed green potato peels in small amounts. Cooked potatoes that had green peels should be fine, cooking the potatoes reduces toxicity. 
  • Rhubarb leaves: are poisonous to almost everything to some extent with  oxalic acid, the fruit stalks contain low levels of the toxin but in small amounts should be fine. While muching on a few leaves may not kill them, it's certainly not good for them. The effects of oxalic acid are very well documented. 
  • Anything super salty:  Too much salt can overload their little kidneys - remember in moderation.
  • 
Citrus Peels: Supposedly they interfere with calcium absorption, I have not seen a verifiable source to back this up and debated even listing it -- but it is a mute point as they really won't eat them anyways.
  • Dried or Undercooked Beans: Contains a poison called Hemagglutinin which is toxic to birds.
 Hemegglutinin is found in Lectin - which is common in legumes (specially soybeans and kidney beans). Cooking the beans reduces the the toxicity. 
  • Avocado Skin and Pit: Low levels of a toxin called Persin. They are NOT fatal - how do I know? Cause before I learned this I feed my chickens avocado all the time and saw no ill effects. Like most of the food on this list your chickens would have to eat a lot of it to kill them. 
  • Candy, Chocolate, Sugar:  Again while not fatal, it's bad for their systems (as most processed foods are to people), and chocolate can be poisonous to most pets.
  • Alcohol, Tobacco, and Other Drugs:  Sorry, someone had to say it - no partying with the chickens their systems can't clear the toxins. UPDATE: On a side note I was recently supplied with some information on hemp seed. It appears to be very beneficial for birds as feed - click here to learn more.
If you want, you can also check out this popular list of Toxic Plants by PoultryHelp.com....but, if you look at the very bottom of the page you will see that the list is pulled from a "reptile book" not a chicken or poultry book. While they are similar creatures they are not the same.


So here's the deal, I understand wanting to feed your chickens anything to prevent waste but if you want chickens to be a part of a "self-reliant, homegrown, organic, lifestyle" and to provide you with nice healthy eggs; does feeding them crap just because "it hasn't hurt or killed them yet" sound like good idea??? No - it doesn't. Here is what a responsible livestock or pet owner does when they find out that something is bad for the animals under their care: They STOP feeding it to them.


________________________________________________

Some History on My Background with Poultry.  

When I write articles about chicken keeping it's from my personal background and experience with keeping poultry and of course new information that I have acquired and am still acquiring by reading books, talking to vets and other chicken keepers. My personal background is this - I keep chickens myself and have for many years, I learned from my dad. Growing up we raised chickens, turkeys, chukars, quail and many different breeds of pheasants (these birds were mostly for meat and wild release). We had hundreds of birds and also competed with them in 4-H. My Dad learned from his mom. Growing up she always kept a small flock of birds, I am not sure where my Grandma on that side of the family learned as her parents came over from Norway. 

I am not a suburbanite transplant to the rural that is just learning how to keep chickens while I blog. I don't say this in a spiteful or snotty way at ALL. I think that is a wonderful thing to get out of the city and learn rural life, and writing about it as you learn is exceedingly helpful to others who are also learning. However - it is also good to learn from and publish information based on years of experience, because as you are gaining experience you may find that some of the things you once believed were incorrect. You may also find that something else works better than what you were originally doing. The information I offer is tempered by that background and experience. 

Please note: there are many lists of foods that chickens can and can't eat on the internet. My sources are linked within the article for credit, any other similarities are merely a coincidence. 

Click here to follow me on facebook! 
For more homesteading and preparedness tips - or just to keep up on what is going on at The Home Front! To share this post, click on the little gray the social media links below.


Eight Great Water Heater Ideas for Chickens


Tired of hauling water to your chickens twice a day because it's frozen yet? Here are some cost saving ideas!

This is kind of a memory dump for me. Everything I have tried and/or seen - gathered up in one spot. Please look closely into the safety and costs involved in whatever heater you decided to use. Remember just because a group of people think that a certain heater is fantastic on the internet doesn't mean it will work OR be safe for your situation.


The Cookie Tin Water Heater

I have seen the Christmas cookie tin heater idea, but something about it just doesn't seem safe to me.  I haven't tried it so I can't say for sure and alot of people have tried it with no issues so who knows? Just my opinion and you know that they say about opinions. These have been floating around the internet since 2006 and there are many posts on them. The nice thing about this approach is that it is priced out fairly inexpensively at $10 (although those materials, drill bit included, would run me just under $20 new at the hardware store, less if I bought a lamp at a yard sale).  Not all lamp assembly kits are equal though so if you try this, make sure what you have will work with your drill bit size and cookie tin. Also if I were to try this, I would use the lowest wattage bulb I could get away with using to increase safety and save money on power.


Photo Credit and Instructions: Mike's Backyard Nursery.

Click here to see the visit "Hens in the Yard" to see their set-up, she has some good ideas to increase safety and insulate.

Click here for the most complete instructions and the best blog post I have found to date on these. I know there is another chicken lady out there pushing these but this is by far the best instructional post I have seen. 


The Cinder Block Water Heater

I have also seen the cinder block idea and I just don't think that would be real effective as cinder blocks don't conduct heat real well, again my opinion....

Click Here to see this post on Backyard Chickens


The Clay Pot Water Heater 

I have neighbor that uses a clay pot with a light bulb (like the one videoed below), and swears by it. I think this is a tad safer (but can't tell you for sure because I have not made one). But if something were to happen and a fire were to start inside the clay pot it would be very short lived and contained.


Thermostatically Controlled Outlet

While this isn't a heater - for any of these DYI ideas to be economical you would want them to be on a thermostat. This is easily done by using a thermostatically controlled outlet (pictured below).There are several models on the market you can find them at farm supply stores, hardware stores, and on Amazon. This would cause the light/heater to come on when the temperature drops to the point where water freezes and then kicks itself back off when the temperature outside warms up above freezing. This would prevent the light/heater from just running and running and running your electric bill up. What's a couple bucks to your bill each month? Well a lot for us.


Metal Base Water Heaters

That being said - for some of these alternative DYI heater ideas by the time you add everything up (and purchase a thermostatically controlled outlet plug) they are coming in just under $30. I can find the regular metal base heaters for chickens at my farm supply store, or feed store at least once or twice a year on sale for $30 (I find that price quite affordable, but you have to watch for the sale). They are UL listed (for safety). This is what we rely on the most, the oldest one I have came from my folks, we used it when I was a kid, it still works, it must be 30 years old.

Metal base heaters work with a built in thermostat so they only heat when they need to and you don't have to buy an additional thermostatically controlled outlet. They work well and are low maintenance, the temperature dropped down to -8 degrees this weekend and my 5 gallon waterer was completely thawed the whole time, this is because they can ramp up to 150 watts to keep your waterer thawed if need be. No running outside to change out the light bulb in a cookie tin to a 60 or 100 watts light bulb. When you work full time and live a self-reliant lifestyle time is a big deal - I use a heating solution that is designed for it's purpose, that works without me tinkering with it or constantly checking on it.
Aquarium Heaters

Another alternative is using an aquarium heater - this usually works best when you are using bucket nipple waterers or down inside a waterer that you can submerse this heater in. They all have built in thermostats so you don't have to buy an additional one. In subzero temps I have had the watering nipples freeze up even with an aquarium heater, so you have keep an eye on it - but it's a $10 solution in the right climates. This aquarium heater pulls 50W when in use (cheap!) and should be good for containers up to 13 gallons. Again this is another nice low maintenance option.


Plug-in Chicken Waterer

There is the old stand by of the plug-in chicken waterer. I am not a huge fan of these because my parents tried them when I was kid and they quit working on us. I thought it was a rather expensive piece of equipment to just up and stop working on you (of course in the middle of a deep freeze) plus the biggest ones I have seen are 3 gallons, we need a 5 gallon waterer as we don't have room for two separate heated waterers. So it's just something I choose not to spend my money on. I am sure there are people out there who use them and have had no problems with them. Again you can find these and Farm Supply Stores, Feed Stores and on Amazon.


Heat Tape Around a Poultry Waterer

You can also take a short piece of heat tape (a common plumbing aid, used to keep water pipes thawed) and wrap it around a chicken waterer. Again, one may want to opt  for the thermostatically  controlled (or temperature controlled) heat tape, which costs a little extra initially but saves money in the long run. If you choose this method, be sure to secure it real well so the chickens don't mess with it.

Click Here to read the How-To post on Info Barrel


Click here to see an article from Mother Earth News on how to make heat tape work with a plastic bucket and watering nipples!

Heated Pet Water Bowl

Lastly, if you want you can always use a heated pet water bowl. The draw back to doing this is the need to rinse it out constantly, because as you know - chickens get water filthy pretty fast and dumping water in the coop or pen may become a problem if temperatures are staying below freezing. You can find these at pet stores everywhere, at feed stores and at farm supply stores. They are also on a built in thermostat so you don't need to go out and buy one.


Speaking from experience - if you live in a place where it drops below freezing and stays that way for a good part of the winter you would be wise to invest in some type of a water heater. I will be easier on you, and your chickens.
________________________________________

UPDATE (11/21/15): I found a number nine! 
Chicken Water Heater Stone

Yep, I found it on pinterest! This looks like one of the best ideas I've seen yet. It using half the wattage of the Cookie Tin Water Heater idea, is safer, cheaper AND it will last forever - no changing light bulbs. This is an idea I would actually try - say goodbye to cookie tins. Check out this wonder link below! 

Click Here for a link to a great set of instructions, photo credit, and just a great overall article by Laura Blodgett at D&B Supply!


Please Note: How cold it is at your place is NOT a contest. There is no "gold star" if you have the coldest winters or if during a few days last winter your place was colder than somewhere in Alaska. Comments to such an effect are immature, annoying and will be deleted.


Do it Yourself Chicken Nipple Waterers

By Stephanie Dayle via The American Preppers Network.


I have always found that reading a "How To" articles on the internet and actually doing them can be a challenge especially if the person writing the article hasn't actually done it themselves, which often seems to be the case. So I want to start off by assuring you that I have, in fact, made these and that I will be truthful about the process. 

Chicken "nipple" waterers are handy frugal devices once you get them working right. They use watering nipples commonly found in rabbit cages or hamster cages to water chickens.


Benefits:
  • Much cleaner. Chickens can't foul up their water with poop, bedding and other debris.
  • Conserves water.
  • Takes them longer to get a satisfying drink but on the other hand also gives them something to do.
  • They are way easier to refill.
  • If you have mounted your nipples on the bottom of a bucket you can easily add an aquarium heater or an equine bucket heater to it to keep the water thawed through the winter. This is not only cleaner than traditional poultry base heaters but it draws less power too.


Draw Backs:

  • They are prone to leaking.
  • You should check them often.
  • They are tricky to clean, but not impossible.

Here is how to build them!

The Hanging Chicken Nipple Waterer

Mount the nipples on the bottom of a bucket (cheaper to make, faster to assemble, easier to clean, and less prone to leaking than the PVC ones, but requires the bucket to be hung from something). 

Hanging Bucket Waterer with Nipples


1) Select a bucket with a good sized bucket metal handle (this is important because plastic handles will eventually break) take a drill with a 11/32 size bit (the bit size should match up with the water nipples - check with the manufacturer for a recommendation if you are not using CC Only Watering Nipples) and drill about 3-4 holes in the bottom of the bucket. Since one poultry watering nipple is ideal for water 3-4 birds if you have more chickens than that, another bucket with additional nipples will be needed. Clean the pieces of plastic that just fell off the drill bit into the bucket out (these will only clog the nipples if they are left in the bucket).

2) Next wrap the threads on the nipples in teflon tape (no matter what the MFG says, use teflon tape) and use a 15mm socket wrench to screw the nipples in the bucket. Doing it by hand sucks but it is doable. Silicone the connection of each nipple on the inside and outside of the bucket and allow to dry for several days in a warm dry area.

3) Hang the bucket so that the nipples are at head / neck height for your chickens or maybe at tad higher. The red or orange color on the nipples will attract your birds to peck at them, it will not take long at all for the chickens to figure it out. For the first week keep an alternative source of water in the coop with them, then you should be able to remove everything except for the hanging waterers. 

Add a lid to the bucket waterer if the chickens can perch on them. You can also put nipples on the bottoms or tops of plastic water bottles, two liter pop bottles or just about any container that has a flat bottom surface and can hold water will work. As I mentioned above you can also add an aquarium heater (click here to see one that is suitable for 5 gallons) to keep the water from freezing up in the winter time. These draw 25 Watts as opposed to the standard poultry base heaters which draw 150 Watts, and are therefore easier on the power bill.

Tip: If you live in an area where you have harsh winters you may want to upgrade to 50 Watt heater.


PVC or Vinyl Chicken Watering Systems


The other way you can go about doing this is to mount the nipples on vinyl tubing or PVC pipe (as shown in the process below), this is helpful if you want to use a large capacity container like a 5 gallon bucket or even a 55 gallon drum, and don't have anything sturdy enough to hang it from. Or if you need to add more than 4 watering nipples to it and don't want to add an additional containers. 

You can use either vinyl hose or PVC pipe for this article I used PVC. 


MATERIALS:
  • 1 10 ft length of 3/4 inch schedule 40 pvc pipe (cut to three inch, five inch, twelve inch and thirty two inch lengths).
  • 1 PVC male fitting and 1 PVC female fitting (the set from the hardware store I purchased had a gasket for each fitting).
  • 1 PVC shut off valve
  • 2 3/4 inch pvc elbow connectors
  • 1 3/4 pvc end cap
  • Enough cinder blocks that you can adjust the height to what is appropriate for your chickens.
  • 1 five gallon plastic bucket with lid


Tools:
  • Drill.
  • Drill bit size 11/32 " for PVC , CPVC or any thick plastic.
  • Small hand saw

Start with a hole in the bucket, it doesn't have to be pretty the gaskets will cover that all up. If you have a one inch fancy paddle bit, use that, I did not so I started the hole with the 11/32 bit and used a little hand saw to hack away at it. Next attach the male and female fittings over the hole in the bucket - they screw into each other (yes, I said it, all the men can stop laughing now) with a gasket on either side of the bucket. Next apply some silicone around each of the fittings and allow time to dry completely.


Next while that dries, cut your PVC pipe - feel free to change the lengths to suit your individual set up. You want the nipples to sit at about the top of the chicken's breast. Studies have shown that chickens will drink more if they don't have to reach up for the water or reach down. Then mark out on your pipe with a ruler or chalk line and pencil where you want your nipples to go. If you want to place a union in your pipe, you'll want to cut for that now too. 

I did not do that this time, but the next time I did use a union and find them very helpful for cleaning purposes. A union will allow you to disconnect one section of pipe from the other, if you have glued everything together this can be very helpful.

Take the parts out to your coop and assemble it without the glue. Make sure everything is the length you want it when remove it to finish assembling the waterer. Next install the nipples. Drill the holes, clean the pieces of plastic you just knocked into your pipe out (these will only clog the nipples) and use the wrench to screw in the nipples. Don't try using your hands - it sucks and you'll only end up mad at me! Use a wrench on your drill to get it done, it helps if someone holds the pipe or if you gently clamp it while working. Don't forget to wrap the threads on the nipples with teflon tape (to reduce leaking) no matter what the MFG says USE TEFLON TAPE on the nipples. Silicone the connection of each nipple and allow to dry.


Glue on your end cap. After everything is dry, take your PVC glue and all your parts out to the coop and assemble your waterer using glue at all the junctions. Zip tie your PVC pipe to the chicken wire or coop to secure it from moving around. Also this will protect your whole set-up if one ingenious chicken decides to try to perch on your PVC pipe. Fill up your bucket, and watch for leaks. If nothing is leaking on your first try, you're far more brilliant than I. This took me several tries on each one I have done. If something is leaking trouble shoot it. If everything has teflon tape, silicone, the nipples are lined up and pointing down, AND it still leaks - you may have a faulty or clogged nipple. Take it off replace it and try again. 

Don't connect this directly to a garden hose!! Water nipples work under low pressure (6 psi or less which makes them ideal for gravity fed situations only). House water pressure can be around 30 to 80 psi.


Remove, clean out and dry waterer for the winter season. It has been suggested to me that in milder climates one may be able to make use of heat tape to keep a waterer like this from freezing up. Since I do not live in a milder climate I have not tried this out. I use this waterer for my meat birds which I only have in the summer time.


Things I wish I would've done in the first place.
  • Used 1 inch PVC pipe and NOT 3/4 inch.
  • Put pipe glue on EVERY junction, they like to leak.
  • Put teflon tape AND silicone on EVERY nipple.
  • Made sure, with a ruler or chalk line, that all the nipples were in a straight line (if one is sitting at a slight angle it will leak, doesn't matter how much silicone you use.)
  • Enlarging or trying to tap the holes to make the nipples easy to install was not the way to go.


Most Popular Posts