If you like what you see here, like me on facebook and follow me on twitter for more tips and to follow what is going on at the Home Front!

Showing posts with label Food for Storage. Show all posts

Low Tech Jerky for Food Storage and a Recipe


A few years back, I saw this segment of “Good Eats” (a Food Channel show) on jerky.  I quickly copied his recipe and logged it in my mind.  Someone asked me a question on jerky last month that made me go searching for this video.  When I found it and watched it again, I was amazed.  They made a ‘preparedness food’ episode and didn’t even know it! I wrote and article about it on American Preppers Network and now I am bringing a version of it here to my own blog.


This will show you exactly how to make your own jerky for storage without a fancy dehydrator or smoker out of a household box fan and some furnace filters (unused of course).  It will EVEN show you how to make your own 'homemade liquid smoke'!  All you need is some spare time to give the video a look, the guy hosting (Alton Brown) is a goofball but his information is good.
For grins I tried it (of COURSE I tried it) and it turned out great.  A little on the crunchy fibrous side but good, I figure if meat is like veggies the snap factor indicates near complete dehydration – and appropriateness for longer term storage.  Alton Brown from “Good Eats” on this episode claims it will last at least 4 years in a jar.  Watch and enjoy!

Here is part one of the jerky episode.


The full episode is now only available to view online if  purchase it - $1.99 by clicking here. I am not making any money by linking to it and am highly unimpressed with Food Network's decision to charge for a 2005 educational video that up until two weeks ago was available completely for free on youtube. But if you do want to see the whole episode I wanted to provide the means. I suppose it's cheaper than a DVD.
Jerky Maranide Recipe
  • 1 1/2 to 2 pounds flank steak
    2/3 cup Worcestershire sauce
    2/3 cup soy sauce
    1 tablespoon honey
    2 teaspoons freshly ground black pepper
    2 teaspoons onion powder
    1 teaspoon liquid smoke
    1 teaspoon red pepper flakes
    Special Equipment:  1 box fan, 4 paper air-conditioning filters, and 2 bungee cords
What you will see in the second half of that Good Eats Episode is how Alton Brown dehydrates his marinated jerky using some clean furnace filters set on top of a simple box fan. Evenly distribute the strips of meat onto 3 of the air filters, laying them in the grooves and then stacking the filters on top of one another. Top these with 1 empty filter. Next, lay the box fan on its side and lay the filters on top of it. Strap the filters to the fan with 2 bungee cords. Stand the fan upright, plug in and set to medium. Allow the meat dry for 8 to 12 hours.
If you don’t want pay to watch the episode and would like more detail on this technique click here. When asked recently during a Q&A session at a public speaking engagement if the jerk recipe and technique was safe he said that it was and otherwise he would not have been allowed by his lawyers or by Food Network to produce it - but he does acknowledge it is not "USDA approved."  

At the very end of the episode he makes a jerky soup / tomato sauce, which would make the perfect food storage recipe.


A word on safety:  According to the USDA, the risk in dehydrating meat without first cooking it to a safe temperature is that the appliance (the box fan) will not heat the meat to 160 °F  — the temperature at which bacteria are destroyed in beef —before it dries.  If the bacteria survives the salty acidic marinade, IF these surviving bacteria are pathogenic (BIG IF), they can cause food borne illness to those consuming the jerky.  In all fairness, many consumer model food dehydrators will only heat homemade jerky up to 130-140°F while drying, which is not technically adequate heat for killing all bacteria either.  If you want to make jerky at home, you should at least review USDAs guidelines to making homemade jerky before you begin.

Other Food Borne Illnesses Risks we Take:
  • Raw eggs found in homemade ice cream (BRING IT)
  • Rare steaks (The only way to fly – in my never humble opinion)
  • Slightly undercooked or dare I even say pink hamburger!!!
  • Raw cookie dough (Ummm….I think I ate too much cookie dough…)
  • Soft chewy bacon (According to my still living Dad, the rubberier, the better)

There are also other special considerations to take when making homemade jerky from venison or other wild game.  Wild game meat is not regulated by the USDA prior to processing.  Venison can also, if not killed or handled properly (this is usually in direct proportion to the hunters skill and knowledge), be contaminated with fecal bacteria.  While fresh beef is usually rapidly chilled and/or frozen, deer carcasses are typically held at ambient temperatures (whatever the temperature is outside at the time of the kill and/or aging), potentially allowing bacteria multiplication. 
So what type of “insurance” do you require for your homemade jerky adventures?  It really is up to you.

How To Make Your Own Sugar

By Stephanie Dayle Via - The American Preppers Network


Making My Own Sugar

It started like this. In my quest for self-reliance, I wanted to have the ability to produce my own sugar if need be. I planned on adding honey bees to the farmstead this last spring - but 'we' spent money on a new chainsaw instead. My next thought was maple trees? Not unless I could pay to put in a bunch of 10 year-old sugar maple tress, hope they all lived, then maybe in another 10-15 years when they started to mature I would have some smallish trees I might be able to tap. Stevia plants? I found out, not only do they not grow in my zone, but I have noticed that they are rather finicky to grow indoors and don't like big shifts in temperature. That wouldn't work in our house with wood heat. Then I found my answer through my grandma.


Public Domain Image
Public Domain Image - Old USDA Poster

Sugar Beets. They used to grow them when my grandma was a child - but not just a couple of rows of them, they would plant a small field of them. She said that when they used the sugar from them, it was always a super dark brown sugar. So if one were using it in something like white cake or egg nog, that it would darken the color of what they were making but she remembered it still tasted really good. She said they processed them outside, because they smelled a little. Sugar beets contain 10-16% sucrose, compared to a sugar maple sap at 2% - this is why you need up to 40 gallons of sugar maple sap boiled down to make one gallon of maple syrup. The process is a tad quicker with sugar beets.


With a little research, I found a place to buy sugar beet seed and another place here and saw that they would grow perfectly in our Zone climate. They can be planted 4 weeks prior to the last frost, are cold hardy, and grow in full or partial sun. They also do not require a lot of water which makes them perfect! Sugar beets are cousins of turnips so their greens are completely edible for people, chickens, horses, pigs and cows. Needless to say, they did not go to waste at my place. They are really low maintenance and I really enjoyed growing them - you can pull them in mid summer or you can wait and pull them in the fall.

Do not worry about 'accidentally' buying GMO sugar beet seed. GMO sugar beet seed is not sold to home gardeners, they are only available to commercial farmers in bulk. So if one wanted to buy some GMO beet seed, you would have to buy a 50lb bag of it (for more info see Fear Free Garden Seeds).

Here is the process I used: Once pulled, I cut the greens off and saved the ones we wanted to eat in the fridge, then I put the greens that were going to the chickens and livestock in a separate bucket. I scrubbed all the beats really well with a stiff bristle brush. When canning beets, you are supposed to boil and peel them first. However, I was not canning these beets wanted to use as much of the beet as possible so I did not peel them.


Next I chopped them up by hand into tiny cubes. I have also heard that using your food processor to shred them works well. Then I added them to a big stock pot and added just enough water to cover them up. I set them to boil for an hour. Your goal here is to extract as much sugar as possible through cooking them so you actually want them to end up all mushy. It was recommended to me that I cook them for 30-45 minutes, but I ended up cooking them for over an hour.


Then you need to strain the beet pulp from the liquid and transfer the liquid into a different pot. I read that traditionally a cheese cloth bag was used for straining then you twist it and wring it out to extract as much liquid as possible. I found using a manual food mill helped move this process along a little faster. I mashed the beets in the mill and collected the liquid below. I stopped short of ricing them, as I didn't want all of the beet pulp to end up in the pot. This remaining liquid was then run through a jelly bag to remove any remaining chunks of plant matter. If you don't remove all the beet pulp - it will not store well.


The next step is cooking the liquid down. I was told that 'back in the day' they would reduce it down until crystals formed. I have found no guide on how much you are to reduce the liquid by or for how long to reduce the liquids. On that note, I was also told that at the time, most people did not have enough patience for crystallized sugar and would instead make beet 'syrup' and use the syrup in place of dry sugar. So with the goal of syrup in mind I brought my beet liquid up to a boil and started reducing, and reducing, and reducing the liquid.


After several hours, I was left with a small amount in one of my smallest pots. Now I was very suspicious of this because I could still smell the 'beets' and it still seemed watery, but when I tasted it - it was wonderful! It had a rich sweet syrupy flavor. So I continued boiling until I could see some 'sheeting' action with the syrup. "Sheeting" is what happens when you pour a little bit of the syrup out of the pot or a ladle and instead of it just pouring out like water, it starts to spread out, stick, and stiffen up a little. It may look like a little sheet of syrup trying to cling to the pot. This is also how to tell if maple syrup is ready for a hydrometer test. 

Before a hydrometer was commonly used, once the syrup started sheeting it was ready. A hydrometer reading will tell you what the sugar content is for the syrup, it has to be done at a specific temperature and would take another complete article to explain. I didn't bother with a hydrometer test as I am not selling my syrup and therefore had no desire to grade it, once it started sheeting it was good enough for me to consume.

Now, at this point if you wanted, you could take your syrup to 40°F - 45°F above the boiling temperature of water at your elevation (a candy thermometer is handy for this, may I suggest a non-digital one) - if it foams you can skim the foam off, or add a drop or two of vegetable oil. Basically what you are doing is making hard rock candy, so if you have ever made candy before: you are taking the sugar syrup to the "hard crack stage" (click link for more info). Then move it to a large flat pan continuously stirring until all moisture is gone. Later after it has cooled and hardened you can use a screen or a grater to grate down the hardened mass to a finer sugar like powder.


Sadly, I didn't end up with much syrup for all of my work. I understand now why each family grew so many sugar beets. I stuck the less than half full bottle of sugar beet syrup in my fridge and used it in my coffee, on my pancakes, and in smoothies for the rest of the summer. It always added a nice flavor. I am afraid if I had boiled it down to crystals I would not have had much to show for myself, however, if storage is your goal, crystals are the way to go.

My grandma told me that while the syrup they had never went bad, it was not uncommon for some mold to collect on the top of the syrup. To fix this they would just scoop it off with a spoon and bring the syrup back up to a boil for a few minutes again and it was good to go, however I don't think I will be trying that unless I have to, so for now I will just use the fridge.


The nice thing about this process is how little waste is produced and how usable every part of the sugar beet is! The beet pulp from cooking the beets went to the chickens and they LOVED it, but people can eat that too. The greens and tops went to both the livestock , chickens, and of course to us. The greens are completely edible - dehydrated and stored for later use in soups or Quiche or you can cook them up like collared greens. Collard greens, in one form or another, have been prepared by humans for 2000 years and were originally a survival food. They are a very good source of vitamin C, soluble fiber, and other good stuff . Here is a quick recipe I used, while not completely traditional - they sure did taste pretty good!


Collard Greens from Sugar Beet Greens

  • 2 cloves of mashed garlic (don't bother with a silly garlic press just use the back of your spoon)
  • 5 cups of chicken stock
  • One to one and a half pack of bacon! (traditionally this would be a ham hock - this recipe cheats and takes less time)
  • 5 bunches collard greens (or in this case beet greens) - rinsed, trimmed and chopped
  • salt and black pepper to taste
Wash the greens thoroughly. Remove the thick stems that run down the center. Don't worry about doing this to the small tender leaves. Stack 6 or 7 leaves on top of each other, roll them up, and slice them at one inch increments. Next, chop your bacon up into one or two-inch pieces and add it to a stock pot over medium heat. Once it begins to cook, add the garlic to the pot and cook the garlic in the bacon grease until it starts to look translucent. 

At this point add the chicken broth and simmer for 20 minutes. Then add your greens to the mix and cook for them for 30 - 45 minutes ( I have found that you don't need to cook beet greens as long as turnip greens or kale), add your salt and pepper and adjust seasonings according to your taste. Then drain your greens and serve. (Be sure to reserve the liquid, it can be used later for re-heating left over greens as they just don't play well with microwaves.) Also I have been told by my friend who live in the South that you can save that broth which they call a collard 'liquor' and use is in further cooking or to sip on when you have a cold or flu. It is full of essential vitamins and minerals including iron and vitamin C. Especially important is that it contains a lot of vitamin K, which aids in blood clotting.

So there you have it. My ongoing experience with sugar beets. 

How To Make Your Own Tallow


By Stephanie Dayle - via The American Preppers Network

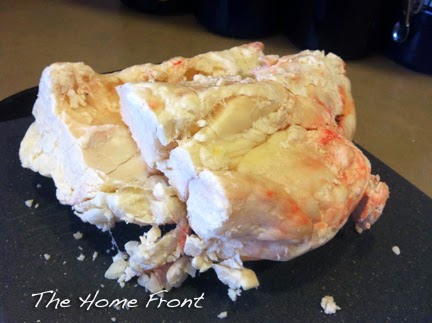
Tallow is rendered beef or sheep fat that is made from suet (pictured below), which is the fat from only around the kidneys or liver. Other beef fat will render down but will not have the same qualities. Rendered tallow is solid at room temperature, and can be stored for extended periods without the need for refrigeration to prevent it from going rancid. This makes it very attractive to those who live off the grid, homestead, or practice emergency preparedness. Tallow can also be made from other animals using the suet fat but beef or sheep tallow is usually preferred.

Making your own tallow, while time consuming, is easy and learning how to make it could be invaluable to emergency preparedness. Making your own tallow means one less thing you need purchase or trade from someone else. Tallow can completely replace your supply of Crisco, it is high in omega 3, vitamin D3, calcium, and contains zero trans-fats. Tallow, being an animal fat is mostly saturated fat. However, it is important to know that recent research has shown saturated fat plays far less of a role in developing heart disease than previously suspected.


The uses for tallow are almost endless. Tallow has a dry waxy texture making it undesirable for sausage and other meat processing, but it does have a high smoke point at 400°F and an even higher flash point ( the temperature at which the oil ignites into flames) which makes it a world class deep frying oil. It is commonly used to make: homemade soap, bio-diesel, leather conditioner, shortening in everyday cooking, tallow candles, and feed for small song birds in the winter time. Historically it has even been used to grease train and steam engine parts and rifles.

Mostly I make tallow for soap and seasoning cast iron (the previously mentioned high smoke point makes it ideal for seasoning dutch ovens). Making tallow is one more way I can make use of the animals we raise for meat so that nothing goes to waste. 

First you will need to gather your supplies:
  • 3lbs (or however much you’d like to do) of Beef Suet – ask your local butcher, grocery store meat departments are often clueless and will just give you any old beef fat. 
  • A slow cooker (this can be done over the stove too – it just requires more supervision)
  • Small wire mesh strainer
  • Lots of Coffee filters
  • Wide mouth quart jar, lid and ring
  • Ladle
  • 2 Quart pot

Beef suet from the store or butcher will always come frozen as suet has a low melting temperature and will begin to melt at room temperature. It is for this reason you should begin to trim and chop it up while it's STILL FROZEN. Be sure to remove any and all meat and as much blood as possible from the fat – this will help ensure that your final product will last a long time without going rancid. Cut your suet up into 1 inch squares, some people then run it through a grater to get even smaller pieces, but I find an inch to work just fine. Feed the tallow trimmings to your dogs, or chickens so nothing is wasted – both animals can process fat better than people and will enjoy the treat.


Put all the cubed fat into your slow cooker and set to high (remember the high smoking point – you aren’t going to burn your tallow in your slow cooker). The rendering process will take a couple of hours – longer if you have bigger chunks of suet. You may want to take your slow cooker outdoors or out to the garage because it will smell. The chunks of fat shrink up and turn a golden brown (these are called cracklings) your tallow is ready to strain.


Now comes the tricky part. Remember tallow is always easier to work with and clean up when it is hot. BUT when it is hot, it can burn you (see below).

Result of not wearing gloves.
 

Wear rubber gloves for some protection and please be very careful!

Ladle the liquid fat and cracklings through the wire mesh strainer into a pre-warmed pot on your stove on low heat. When the slow cooker is empty, take your ladle and press the cracklings in the strainer to extract as much liquid as possible. You can then dry your cracklings and put them on your salad, bake them in cornbread, or eat them like pork rinds. Chickens also LOVE cracklings, my cracklings usually go to the chickens.


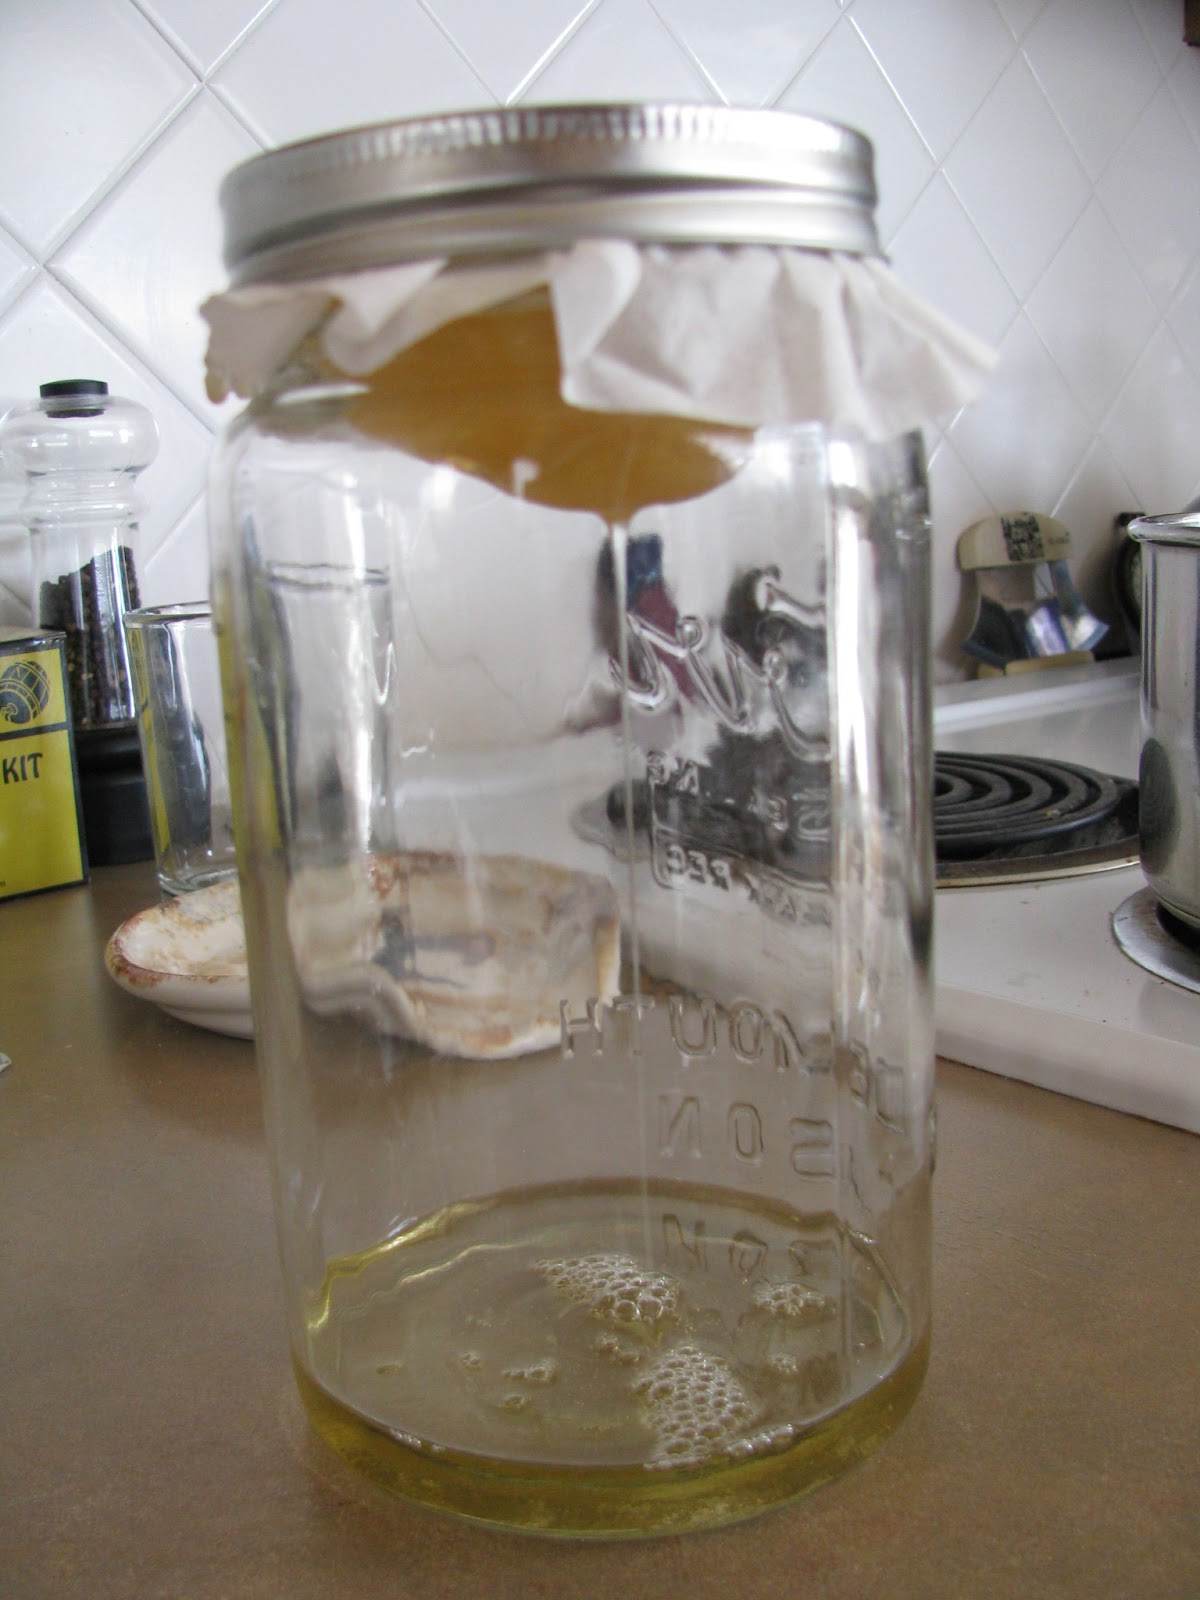
Take a coffee filter and put it over the top of your clean quart jar making a little well for the oil, hold it in place with the ring for the jar as pictured. Next ladle your liquid tallow from the pot to your jar. This will take a long time, be patient and change your coffee filter often as it will clog while removing impurities you don’t want in your tallow. If you cheat and use a paper towel or poke holes in the coffee filter you will have to repeat the whole process to get the purity you need.

Tallow will strain better hot – so if it is just barely dripping, increase the heat on the stove to med-low or medium, just keep an eye on your oil, you will smell it if it gets too hot. This is the slowest part of the process and may need to repeat it if your liquid tallow is still cloudy and/or contains sediment. The more pure your tallow, the longer it will last.

Once you have strained all your liquid tallow into the jar (be careful the jar will be just as hot as the oil) clean up the jar and ring so no grease remains on the rim. While jar is still hot, treat a canning jar lid briefly with boiling water just as you would for canning and set it firmly on your jar of hot tallow. Next apply the now clean canning jar ring. Using oven mittens, set your jar in the fridge and leave it alone. It will seal itself similar to as if you had canned it. Keep your tallow in a cool dry place this way for six months or longer – I have kept tallow good this way for a year. It will turn a pretty snow white color and solidify.


You now have tallow ready for storage, cooking, soap making, or whatever you want to use it for!

Trouble Shooting
Should all rendered tallow will turn a pretty snow white color when its cooled?
Yes it should. Things that would prevent this from happening are: Not completely filtering the impurities completely out of the suet. Solution: heat the tallow back up and run the hot oil through coffee filters and even though it takes forever and you have to change the filter out with every scoop, DO NOT CHEAT, or try 'wet rendering' the suet - you read about that method by clicking here.

Also what might prevent the tallow from turning white is if the butcher shop or meat counter did not actually give you "suet." If they just gave you some random frozen beef fat, that may have been labeled suet - but wasn't actually suet, no matter how much you filter it will not turn a snow white color. Solution: Feed the beef fat you just rendered to wild birds, your chickens, dogs, or use it for soapmaking, just know that it is not going to depart the same qualities to your soap as real tallow would. For the next batch, go to a different store or shop and make sure the fat they give you looks similar to the picture and description above. Real suet should have a unique waxy texture, it should be crumbly when you cut it. 

For more information on saturated fats and health benefits of tallow check out these links:

Memorial Day Weekend DEALS for Preppers!


During each major holiday weekend retail stores around the nation have big sales and offer great deals on things we all want to stock up on. Often you can't get these deals during any other time. You only need to know what to look for.

I am going to focus on national chains, not because I don't believe in shopping locally, but because my local hometown store deals will not help most of you. Also I am not against making stuff myself. If you can make all of this stuff yourself, well then, good for you! But not all of us can.

**Prices will vary location to location - but in general this is where to look and what to look for.**
THIS INFORMATION IS CURRENT AS OF 5/23/2013 but these are the typical items to look for at the follow stores EACH YEAR.  

Here are some great deals for the prepper minded out there who are stocking up!


Charcoal  $9.99 - You may be able to pick it up for a couple of bucks cheaper during Labor Day, but this is the best deal you will see until then. Lowes is offering two 20 lb packs (40 lbs total) for $9.99. Charcoal is a good emergency cooking fuel to keep on hand and it will last a long time if kept dry, but it must only be burned outside only. (Charcoal is a big consumer of oxygen. Do not burn charcoal indoors, ever, it will rob all the oxygen out of an enclosed room before any carbon monoxide gets you. )

Pork and Beans  33¢ - We all love Pork and Beans and it doesn't make a bad emergency food in a pinch. My local WinCo stores recently had Van Camps Pork and Beans for 33¢ a can.

Baked Beans - regardless of the brand, many stores have baked beans on sale right now. Beans are always a good food to keep on hand because they can be easily combined with something inexpensive like rice to provide a life sustaining meal. This combination of beans and rice has been a prepper staple for years. I store and use a variety of canned beans as well as dried beans.

Folgers Coffee  $6.98 - This doesn't usually make my list but I noticed Walmart had it on sale for $6.98 a can, which is dirt cheap. Now, I am not a coffee snob so it really doesn't bother me to use cheap pre-ground coffee that has been stored for 6 months. Coffee is coffee when you need it, and at this price it will save you some money. (If you hear anyone say "pre-ground" coffee only stores for 6 months, stop listening to that person. Of COURSE it stores for longer than that, it just won't taste as good that's all.)

Camping Food - Mustard (which never goes bad), ketchup, relish, hotdogs, beans, and marshmallows (which can be dehydrated and stored, kid you not!) are all on sale this weekend. Check you local grocery stores for some of the best deals of the year.

Solar Lights  $1.99 - Again for Labor Day weekend and year-end clearance you might be able to get these cheaper if you watch them like a hawk and if there is any left, but $1.99 - $2.50 (Walmart and Lowes) for a larger solar light, not one of the smaller dollar store ones, is not a bad deal. There are literally hundreds of uses for these things. They would make a nice emergency light source if the grid goes down. Charge them up outside during the day and bring them in at night, pop the battery out to turn them off. Take the top off one, and glue it to the top of a canning jar for a homemade lantern. Avoid candles, and save your batteries for something else. Click here to see how to use them as a cheap solar battery charger.

Bags of Fast Setting Concrete $3.98 - This is great to keep on hand if you have your own house and property. Home Depot has some for $3.98 a bag right now. I find we use several bags a year on various projects, but it's also good to keep on hand for just 'incase'. Just incase you need to make emergency repairs to your property or house when the cement company is no longer answering the phone. Just incase you need to reinforce a gate, fence post, or your house to beef up security. You know just incase. Keep in mind you have to keep this stuff in a DRY location or you'll just end up with a big cement brick.

Canning Jars - Tis the season for canning jars! Jarden Home Brands (the parent company of Ball and Kerr) puts out several great coupons for their jars around this time of year in the Sunday inserts, keep an eye out for them. When you combine these coupons with a sale price you can get really good deals on new jars. Bi-Mart has pint jars on sale for $7.99 right now and while I don't consider that a super great deal - if you were to combine that sale price with a $1.50 off coupon, it is fine deal indeed! Keep an eye out for more canning jar deals around the 4th of July.

Ortho Home Defense Spray $5.98 gal  - I normally don't encourage the use of chemical insecticides - especially if you have a garden, pets, or chickens! There are many effective organic options. But if you have ever seen an episode of Discovery Channel's INFESTED you would know that in some cases it is necessary. If it ever came down to bugs eating my food and me going hungry?  I'm busting out the chemicals, sorry bugs.  Walmart.

Spectracide Hornet and Wasp Spray $1.58 - Again with the chemicals remember anyone can make an very effective bee/wasp spray out of soap (dawn) and water, that will not harm the environment at all but will effectively kill a hive (the soap clogs their breathing holes). All you have to do is wait until they are back at the hive and less active around dusk and you won't even need that 22 foot reach.  (Remember modern "environmentally safe" propellents used in spray cans will not last longer than a year so don't go crazy on the hornet spray thinking you'll be able to use it a few years down the road.)

Tiki Torches $5.00 - Can burn more fuels that what is provided
at the store for $10 a gallon. They will also burn, used veggie oil, kerosene, mineral spirits, rendered bacon grease, diesel, and rubbing alcohol or any denatured alcohol (Everclear anyone?). Handy to have to light up your property if needed. Just please don't set your house, the woods, or your neighborhood on fire during a national emergency or during Any. Other. Time. This deal is at my local Lowes.

Camping Supplies - Some good deals can be found on camping supplies for Memorial Day Weekend, just make sure not to impulse buy because again retailers are not as motivated as they will be later to move inventory.

Coleman Propane $5.00 - Double set of Coleman Propane tanks are on sale this weekend at Walmart. Making each one $2.50 each. Normally this would not be that special, however I have been hard pressed to find a better deal on little propane tanks lately, seems like last year you could find little propane tanks all the time for cheaper...

Garden Supplies - Some good deals can be found on garden supplies too, especially on seeds and potting soil, be sure to price check however as I have not seen a sale price that will beat Costco's regular everyday price on potting soil.

HTH - Shock and Swim 1 lb $1.99 - Ace Hardware has Shock and Swim on sale this weekend. HTH is High Test Hypochlorite. It is mainly comprised of Calcium hypochlorite which is used for the disinfection of drinking water and swimming pool water. It is super concentrated powdered bleach and you can use to to mix with water to make your own bleach. I prefer to buy Super Shock and Swim as it contains a higher percentage of Calcium Hypochlorite than regular Shock and Swim. Safety? Here is a link to the actual Material Safety List for Shock and Swim. The safety concerns they list are universal to ALL FORMS of powdered concentrated bleach - because, in that form, it's not safe to consume or breath.  Mixed with water, it's actually a different product.  As you can see on the list there are no algaecides in this brand of powder which would make it exceedingly toxic to use to disinfect drinking water, the rest of the ingredients mainly provide stability and prevent caking.


UPDATE: 5/24/2013 - One day after posting this - I saw my first happy customer on Facebook! You go Catherine! THIS is why I write, not to sell charcoal, but to help others.


Shopping Tips to Help Maximize Savings:

  • Keep in mind the time of year. Memorial Day weekend is a hit and miss. Retailers want you to come and shop but the incentive to mark down the summer stuff you want is not always there. Some of these items - such as charcoal, camping gear and garden gear can be had at slightly lower sale prices during Labor Day weekend because retailers want to get rid of their inventory rather than take a loss on it by sending it back or to a 'end of season' clearance house. 
  • Focus on the Door Buster deals.  They will tend to be the better price points than the ones on the inside of the flyer - but don't ignore the inside of the flyer either, it's worth looking through. 
  • Use coupons when you can. Combine them with sale prices to drive your price per item even lower! But don't buy an item just because you have a coupon, it has to be worth it. 
  • Use price thresholds whenever you are shopping. This means keep a list of the lowest sale prices you commonly see for certain items that you want or usually stock up on. When you see a price that falls below this what you normally see (aka: the price threshold) this should trigger you to buy. If the price meets your threshold AND you have a coupon, even better!
  • Buy enough of the item to last you until the next sales cycle. This could be the next major holiday weekend or next year, ignore funny looks from other shoppers and nosey questions. Even if you are not a 'prepper' this will insure that you never have to pay "retail" for that item permanently lowering your grocery costs. 

Just incase you are wondering about my expertise in this area: my 'real job' has been in Marketing and Advertising for the past 15 years. So I know how this stuff works. Hope this helps you save some money - happy shopping and don't forget to remember those who served.


Cake Mix for Food Storage and Recipe!


If you are like me and enjoy something sweet every now and then, you might want to consider adding some cake mix to your food storage.  Some people may think this is a frivolous item, but some good 'easy to cook' comfort foods may come in handy to help keep everyone sane.  Plus, I believe in prepping what you eat and eating what you prep.  This is the surest way to have a store of food that you know how to cook, like to eat, and will eat.  This also means that you are rotating your food and using it.

There are lots of things that you can make with cake mix.  You can make cake pops, you can make cupcakes, you can make cake mix cookies, you can make cake batter waffles, and you can use cake batter to turn simple popcorn into a delightful dessert.  No oven?  No electricity?  You can make cake batter pancakes topped with some warm frosting (cause nothing goes better with cake batter pancakes than more sugar) with a frying pan over a wood stove or even a fire.  You can also use it to help out cornbread, and you can make brownies with chocolate cake mix.

As you can see its a very versatile item to add to your rotation.  Anytime I can find something like cake mix, that has many uses, and that stores well, its a no brainer to add it to my food rotation.  You can safely keep a 1-2 year supply on your shelves and rotate them or you can stick them in long term storage for perhaps up to 5 years.  There are two main approaches you can take to cake mix.

Buy it in the Box.
 For the most part I will buy mine in the box.  I wait for there to be a couple of coupons then I wait for the mixes to go on sale somewhere, ideally for .89 to .99 cents a box, then I apply the coupon which knocks at least half of that off.  I will buy as many as I have coupons for.  At .50 cents a box, you might be able to beat that by making your own mix, but not by much once you count for all the ingredients.  If you can't get the price per box down that low, you may want to consider making the mix from scratch.

For those of you out there who are gluten free, Betty Crocker has several different types of gluten free boxed cake mix, as do several other different companies - but you guys are going to save the most money by making the mixes from scratch as food companies are still charging a premium for gluten free food.  Click here for a simple GF Yellow Cake Mix recipe.

With Food Storage
I already have the ingredients needed for these mixes in my food storage already, if you don't plan on picking up some egg powder, and powdered milk for your storage.  Some people add these ingredients to the mix prior to storage so when it comes time to cook it, all they have to do is add water and butter.  If the mix calls for butter or oil you can do a few things, you can either make sure you have enough butter and oil stored to get you through a disaster, you can add powdered butter or margarine to the mix, OR you can sub out the butter or oil for a bean puree.

Now before you wrinkle your nose, I have done this several times to make cakes a little more healthy and/or to make them vegan for friends of mine and it has tasted JUST FINE.  Really!  In a long term emergency, replacing butter or vegetable oil with some (soaked and cooked) bean puree, in cake mix will save that precious resource for other uses, it will also increase the amount of protein in the cake mix making even more useful in a situation where protein might be a luxury.  The amount of beans you would want to add is about 1/2 cup of bean puree per box maybe a tad more.  That is just about a can of beans, drained and rinsed and pureed.  Think black beans for chocolate cake and white beans for yellow cake.


From Scratch
Learning how to make cake mix yourself is a good thing to do whether your are storing it or not.  It's another exercise in self sufficiency and your end product will inevitably be more healthy than the store bought version.  Plus, in a long term disaster, you will eventually run out of pre-made mix, and if you want cake, you will have to know how to make your own from scratch.
THE MIX (this is based on Everyday Food Storage's recipe for yellow cake mix but I made a few modifications to make it work for me, keep in mind cake made from scratch will have a slightly different texture than the store bought stuff):

  • 9 Cup flour total - If you are milling your own flour  from wheat berries you will want to reach for some soft winter wheat as you want the lower protein content of that type of wheat for cakes; you will also want to mill it a tad more fine than all purpose flour but you don't want it so fine that you make something like wheat starch.  If you are not milling your own flour, you can use 9 cups of pastry flour (which is almost just like cake flour but not bleached) or 9 cups of all purpose flour with one tablespoon of flour out of every cup replaced with a tablespoon of corn starch)  OR you can just use cake flour (I am not a huge fan of cake flour because it is bleached and so refined and, therefore, not real good for you but it does really make the best cakes).
  • 6 Cup sugar - just regular sugar
  • Heaping 2/3 Cup dry non-instant milk powder or 1 1/3 C. dry instant milk powder
  • Heaping 1/4 Cup baking powder
  • 4 tsp salt
  • 1 tsp vanilla powder - I have found that vanilla powder is a little easier to  incorporate into baking mixes for storage.
  • 1 1/3 Cup dry egg powder (this assumes the egg powder ratio is one large egg = 2 Tbs dry egg powder + 1/4 Cup. water, if your brand of egg powder is different you will have to adjust the recipe).
     
Combine ingredients thoroughly and store in an air tight container.  You can mix this up - freeze it a couple of times to kill any dormant bugs in the flour and seal it in a Mylar bag with an oxygen absorber.  Don't forget to write the type of cake mix and the cooking instructions on each package.  Or you can mix it up as you need it, if you are already stocking all the ingredients.

Using the Mix:
  • 4 1/3 Cup  yellow cake mix (make it a heaping 4 1/3 Cup if you used instant milk powder)
  • 1/2 Cup softened butter or bean puree
  • 1 3/4 Cup  water
  • 1 tsp vanilla (or 1/2 tsp of vanilla powder)
Heat oven to 350 degree F.  Grease bottom and sides of 9×13 pan, two 9×9 pans,  or two 8×8 round pans.  Beat all ingredients with electric mixer on low speed for 30 seconds, then beat on high speed 3 minutes.  Pour into prepared pans and bake 9×13 35-40 minutes, 9-inch 25-30 minutes, 8-inch rounds 30-35 minutes or until toothpick inserted in center comes out clean.


Public Domain Image

Everyday Food Storage suggests these variations:  Add 1 Cup freeze dried fruit hydrated in the 1 3/4 Cup water to make it fruit flavored.  OR my variation: add some fruit jam which you made yourself in-between the layers of cake! You can also experiment with adding jello or kool-aid to flavor and color your cake mix.

Click here for a Chocolate Cake Mix recipe also from Everyday Food Storage!

Do you stock boxed mix or make it from scratch?  I hear about people making cake from scratch less and less these days, it is truly becoming a rarity.  Also let me know if you give this a try!


Foods That Will Outlast You

By Stephanie Dayle


A while back I read this great little article called "10 Cooking Staples that Can Outlast You" by Laura Moss - and wanted to share with you. While it was not meant for prepping you can absolutely use it as such. I added a few extra thoughts of my own in BLUE type throughout the article.

Go ahead and buy extra of these foods when they are on sale and don't throw them out if you find them as established residents in your pantry.

Sugar


Regardless of whether your sugar is white, brown or powdered, it will never spoil because it doesn't support bacterial growth. The challenge with sugar is to keep it from hardening into chunks. To keep sugar fresh, store it in an airtight container or seal it in a plastic bag. If your brown sugar is more like a brown rock, you can revive it with just a minute in the microwave on low heat. 

Or by throwing a piece of bread or a marshmallow in the bag with it. The next time you grab it - it will be good as new. Brown sugar costs a bit extra so if you want to skip it you can add a little molasses to your white sugar (one cup of sugar to one TBS of molasses) and make your own brown sugar. Molasses is the by-product from making white sugar, so you are just adding that back in. 

Sugar can also be combined with iodine to make "Sugardine" - a homemade antiseptic commonly used on horses and livestock for abscesses and thrush but theoretically could also be used on people. The theory behind 'sugardine' is that sugar doesn't support bacterial growth and neither does iodine - combine the two you have an antiseptic paste that lasts forever.


I would also add Molasses to the list of Foods that will out last you. It's good for you as it contains minerals like iron and magnesium. Molasses is appealing to livestock and is good for them too. It's a nice flavoring in recipes - you can't really go wrong with it, plus it will not go bad. If you see molasses on sale grab a bunch of it! The "Sulfured" part on the label just means that it was the by-product of immature sugar cane plants and they added a little bit of sulfur dioxide to it as a preservative - it's still perfectly safe. "Unsulfured" molasses doesn't need a preservative. Molasses can also be added to garden soil in small amounts as a soil amendment. 

Blackstrap Molasses is made from the third and final boiling of sugar cane to extract sugar and is the least sweet and most bitter, however it contains the highest amount of minerals and vitamins - you can usually find it at health food stores. It's this form of molasses that is usually used in "sweet feeds" for livestock. Blackstrap Molasses also is used to make rum or ethanol (a fuel you that can be used for cooking or light or,.... if you have "kahunas" you can drink - the 190 proof version of Everclear is an example of ethanol alcohol). 


Pure vanilla extract

If you have real vanilla extract in the back of the cupboard, there's no need to throw it out because it lasts forever. It may be more expensive than its imitation counterpart, but its shelf life certainly outweighs the extra cost. Keep that vanilla flavor at its best by sealing the bottle after each use and storing it in a cool, dark place. 

Vanilla is really affordable right now, and it's also easy to make yourself but if that's not your thing try Sam's Club or Costco for nice bulk prices. Same goes for all the other extracts. Click here to see how to make homemade extracts.

Rice

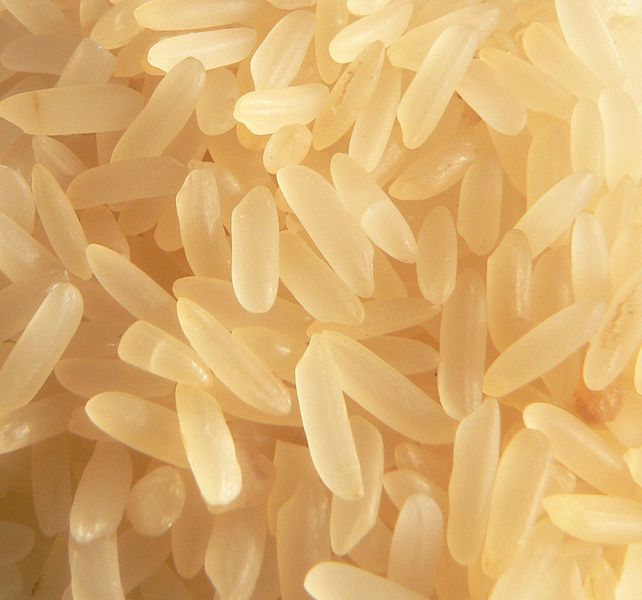
White, wild, jasmine, arborio and basmati rice all keep forever so there's no need to throw them out. Brown rice is the one exception because it has a higher oil content so store it in the refrigerator or freeze it to maximize its shelf life. Once you've opened a bag or box of rice, move it to an airtight container or resealable freezer bag to keep it fresh. 

Rice is wonderful, it is a perfect emergency food to keep on hand, it's still cheap right now you can pick up 25 lbs at Cash and Carry or Costco for around $10.95. Rice is an expander - it makes a bigger meal out of everything you put it in and you can even pop it like corn or make a dessert with it. Most white rice is enriched with B vitamins in the United States - so even if you have a diet rich in white rice you are not immediately at risk for any deficiencies. Rice is a source of protein but it is not a complete protein so you should always be pairing it up with nuts, beans, meat, fish and other sources of protein. 

Click here to see some rice already prepackaged and ready for storage.

Corn starch


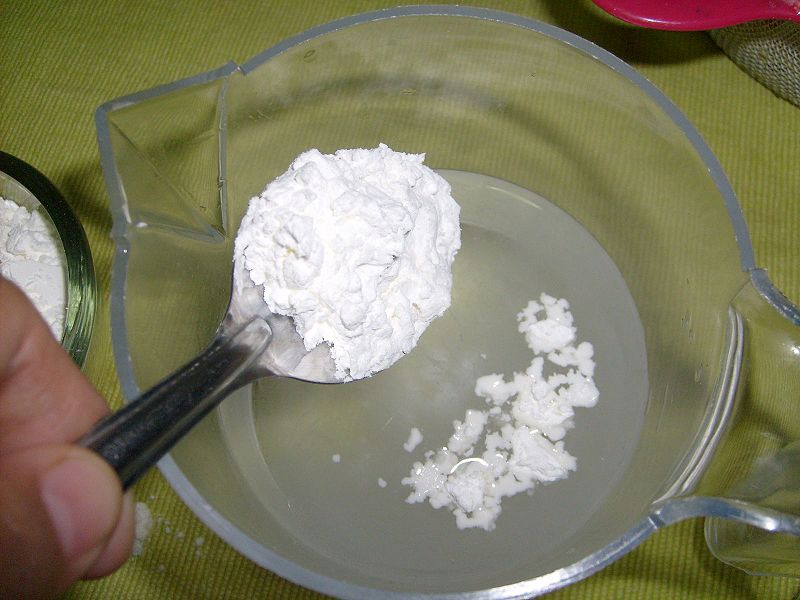
You can thicken gravies and sauces for years with just one box of corn starch because it keeps indefinitely. Store this kitchen staple in a cool, dry area and be sure to reseal it tightly after each use. 

Sealing it well keeps critters out of it too. Any flour or starch you choose to buy extra of and store should be stuck in your freezer for a minimum of 3 days to kill any insect eggs that are most likely hiding inside (gross - but its legal because the eggs are not harmful, they are just annoying when they hatch and eat your food. Personally I take them out of the freezer, let them come up to room temperature, then in 24 hours stick them back in for another 3 days). Corn starch can be added to gluten free flours to help make gluten free bread, used as a powder to help dry and sooth irritated skin, as a paste to help draw out the pain of a sting or bite, and as a binder glue in many crafts. It's also used make the white markings on a horse sparkle.

Honey


Whether you use it in your tea, on your toast or as an alternative sweetener, that jar of pure honey is good forever. It may get grainy or change color, but it's still safe to eat — and delicious — because its antibacterial and anti-viral properties keep it from spoiling. You can help keep it fresh by storing it in a cool area, and you can improve the quality of crystallized honey by placing the jar in warm water and stirring it until the grainy parts dissolve. 

Honey will only have those "antibacterial and anti-viral" properties that are so useful for when we are sick, if it is "raw" honey and has not been pasteurized. Raw honey should not be fed to children under the age of 2. Another way to de-crystallize raw honey without pasteurizing it is to stick the honey jar in an oven over night with the oven light on - in the morning your honey will be good as new. This low heat will not ruin your raw honey. 

Hard liquor


Mixing drinks at your holiday party? There's no need to replace those decades-old bottles of gin and whiskey. Distilled spirits like vodka, rum, whiskey, tequila and gin don't ever spoil — even after opening. The taste, color or aroma may fade over time, but it'll hardly be noticeable. Keep the bottles tightly closed and store them in a cool area away from direct heat or sunlight. 

High proof booze can be used to disinfect wounds or surgical tools, add flavor to recipes, vodka can fluff up pie crusts, and can be used as household cleaner. It can also be used in moderation as a stress reliever and mild sedative. Ethanol alcohol, such as the 190 proof Everclear is also fuel you that can be used for cooking in alcohol stoves (these can be found in marine stores as they are commonly used in boats, or homemade out of pop cans or soup cans) or if you have "kahunas" you could drink it. And historically booze has ALWAYS been an item of barter.
   
Salt

The contents of your salt shaker will never spoil, regardless of whether it's basic table salt or sea salt. Simply store it in a cool, dry place and salt will keep indefinitely. 

With water, salt and sugar you also have Homemade Gatorade to administer in conditions of high heat, fever, or dehydration (6 tsp sugar, 1 to 1/2 tsp salt to one liter of water). 

Twice daily salt water rinses are helpful for sores in the mouth, bitten tongues, and tooth aches. Saline rinse for the eyes can remove debris and other irritants. Iodine deficiency commonly leads to thyroid gland problems, and is the leading preventable cause of mental retardation, specifically endemic goiter, a disease characterized by a swelling of the thyroid gland, usually resulting in a bulbous protrusion on the neck. Iodized table salt has significantly reduced these disorders of iodine deficiency in countries where it is used. That being said, *today* the average person gets more than enough iodine in their diet so iodized salt is not required in a healthy diet - however if you are storing salt for emergencies (5 lbs per person in your family is the MINIMUM recommendation) iodized salt is a GOOD thing.

Syrup


If you come across a years-old bottle of corn syrup in your pantry, don't throw it out. This sweetener keeps indefinitely as long as you keep it sealed and store it in a cool, dry area. You can also make your own.

What good are pancakes or waffles without maple syrup? Luckily, this flavorful syrup will never spoil if you refrigerate it or freeze it. For long-term storage, seal it in an airtight plastic container and freeze it. 

Even if Maple Syrup does crystalize, as I have never heard of it "spoiling" - you can heat it back up to a liquid form much like honey so I would forgo freezing. If you are looking to make your own, you will need several mature sugar maple trees but you can also make syrup from other maple trees - sugar maples have the highest concentration of sugar which is why they are used, but if you had to, you could boil almost any sap down to make syrup - its just going to take ALOT longer and one would need alot more sap. Let me put it this way, for sugar maples you need 20-50 liters of sap to make ONE. Liter. Of syrup. By boiling for a couple of days. That's why other trees usually aren't mentioned if you drop even one percent in sugar content you will have to double the amount of sap you collect. Grade B is the premium grade of maple syrup and also indicates a darker color and richer flavor than grade A.

Same goes for Agave Syrup. Which has a lower glycemic index than corn, maple, or sugar and it a good choice for those keeping tabs on their sugar. Plus Tequila is made out of it, so it has to be good eats.

Distilled White vinegar

This wonder product can be used for everything, from making marinades and salad dressings to cleaning house and doing laundry. But the best thing about distilled white vinegar is that it lasts for years. Simply close it tightly after each use and store the bottle in a cool, dark place. 

If you use vinegar for canning like I do you may want to have as much of it as you can. My household cleanser recipe is one part water, one part vinegar, with a good dose of lemon juice thrown in for scent and extra cleaning power.


Baking Soda

Baking Soda is pure "sodium bicarbonate", it is primarily used in cooking (baking), as a leavening agent. It contains NO aluminum. Baking soda is one of the most useful things you can stock up on and it will out last you as long as it is sealed properly and stored in a cool dry place, preferably vacuum sealed with an oxygen absorber and doesn't come in contact with anything acidic or damp. 

The uses of it are too many to list. It is a miracle in the absence of yeast. It can be used with cream of tartar and corn starch *to make Baking Powder* (1 tsp. baking powder = 1/4 tsp. baking soda + 1/2 tsp. cream tartar + 1/4 tsp. cornstarch) and when you make baking powder yourself there is no aluminum in it. In most brands of commercial Baking Powder there is aluminum, which some people would like to avoid. Baking powder only lasts a year two - so when we last ran out, I switched to making my own and I am actually more happy with the homemade stuff.  

Baking soda can be used as a household cleanser for scrubbing power, bubble power, and odor absorption power. It can also be used in first aid as paste to draw the  pain out of bites, stings, to sooth itching. It can be used in baths to soften and sooth skin. It can be taken orally to ease heartburn, used as a mouth rinse, made into a paste with hydrogen peroxide to use as a tooth paste, and it can be used as a first line treatment for burns.

Baking soda is also a proven weapon for grease fires and it can help balance the water in your pool. Go ahead and buy a bunch of the stuff, its amazing! If by chance you don't seal it up and store it right, don't worry it while "go bad" per-say, it will turn into 'Washing Soda' (sodium carbonate). Washing Soda cannot be used for baking or first aid purposes but you will still be able use it to wash clothes, dishes, and as a general household cleanser. 


Other Items that Store Long Term

(Items highlighted in blue are available through the Home Front General Store already pre-packaged for long term storage - click on an item to view) 

-Macaroni Noodles 
-Old Fashioned Rolled Oats 
-Mustard (in a cool dark place)

Most Popular Posts